
Momentum
Somewhat recently, I got interested in antweight fighter robots. This is similar to your familiar combat robots, well known from the fan favourite Battlebots TV show, but in a much smaller form factor, ranging from around 100 grams up to around 500 grams.
In essence, your job as a participant in these competitions is to create a machine capable of delivering as much energy as possible from your batteries into the hull of your adversary, as quickly as possible1.

After such energy transfer, hopefully the opponent will be disabled and you will be happily giggling in self-indulgent happiness, proud of your superior energy transfer design.
Spherical Motors
From this arguably over-abstract and quite physicist-like understanding of robot fights, the obvious corollary is that one must integrate in their design the most efficient method of converting electrical energy into momentum.
This is also known as a big motor.
And one way to integrate a motor as big as possible driving a weapon is to:
- Make the whole device the weapon.
- Use a single motor for both movement and weapon, allowing all the mass to be concentrated in one place.
And thus I was set on my way to try and make spherical motors.
Sphere
The first step in my journey was, you know, to make the sphere part in spherical motor. For that, I dusted off my 20 year old knowledge on the so-called platonic solids, and purely based off vibes, I decided the dodecahedron is a cool-looking sphere approximation.
A few hours later, I had my spherically-adjusted dodecahedral section modelled in Onshape (please FreeCAD free me from these shackles) and ready to be printed out.

Once you get enough (known in the business as 12) of these together and once you have glued your fing-I mean, your pentagons with superglue, you will get a somewhat soccer-shaped little ball. But remember you are making an electrical motor, so you need to embed little magnets inside as well!

From this point on, a lot of sanding with abrasive pastes and a semi-spherical mould ensues until all the little bumps and joins in the surface are evened out and you have a pretty good sphere.
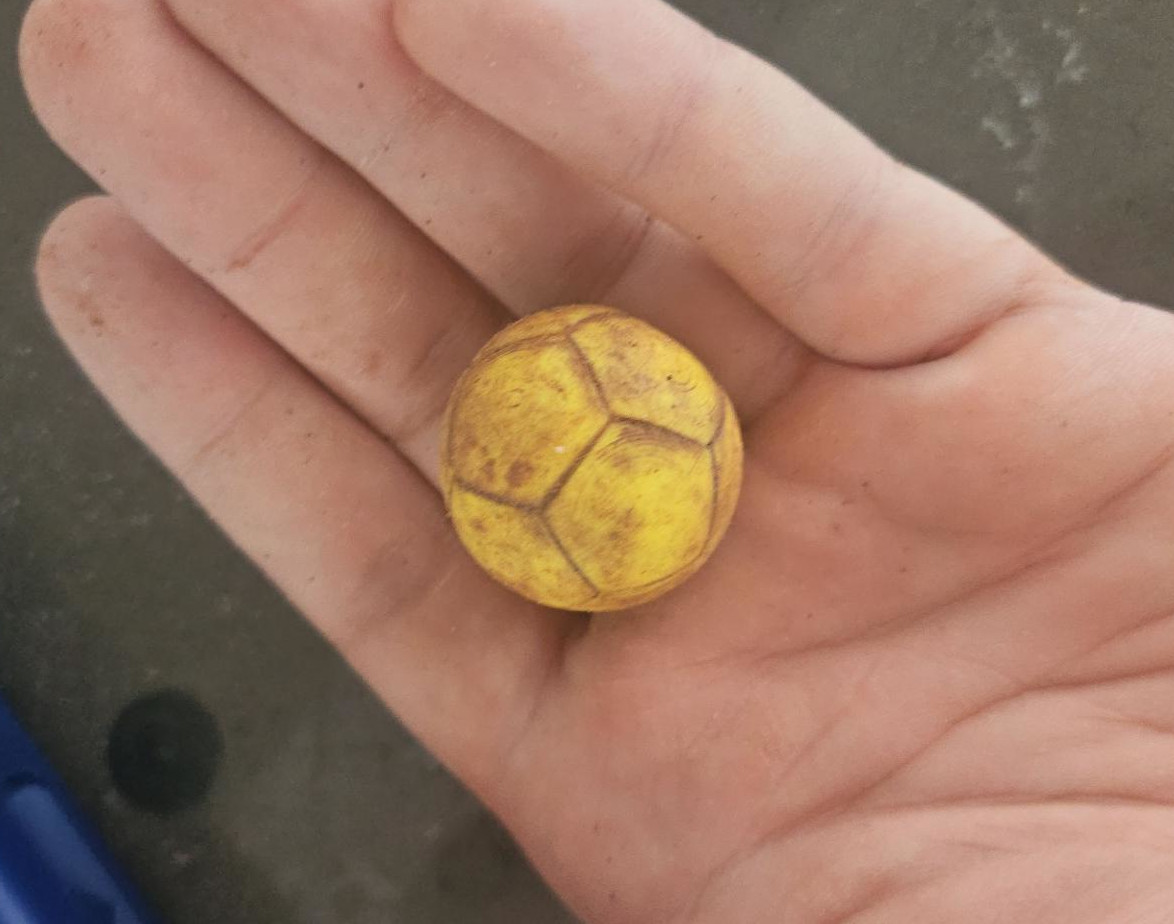
The fact I was gluing together 12 little things later led me to realise there was a lot of compounding error in all the little joints and my spheres were worse than they needed to be. In later iterations, I instead just made two sphere halves, leading to a single seam that was much easier to sand.

Motor
A spherical motor is unfortunately not just a little rotating sphere, creatively named rotor, but it also needs the static part that makes the sphere rotate, even more creatively named… stator.
My first iteration of this was to superglue some electro-magnets made of screws around a roll of tape, in very scientific fashion. With some controlling logic in a Raspberry Pi Pico W I had laying around, plus some L6202 motor controllers switching the electromagnets on and off in a cycle, I had my first spinning contraption.
The keen-eyed reader will notice, this is not a true spherical motor at this point as there is a needle going through the rotating part (rotor), essentially constraining rotation to a single axis - like a normal useless motor.
Sphere-er
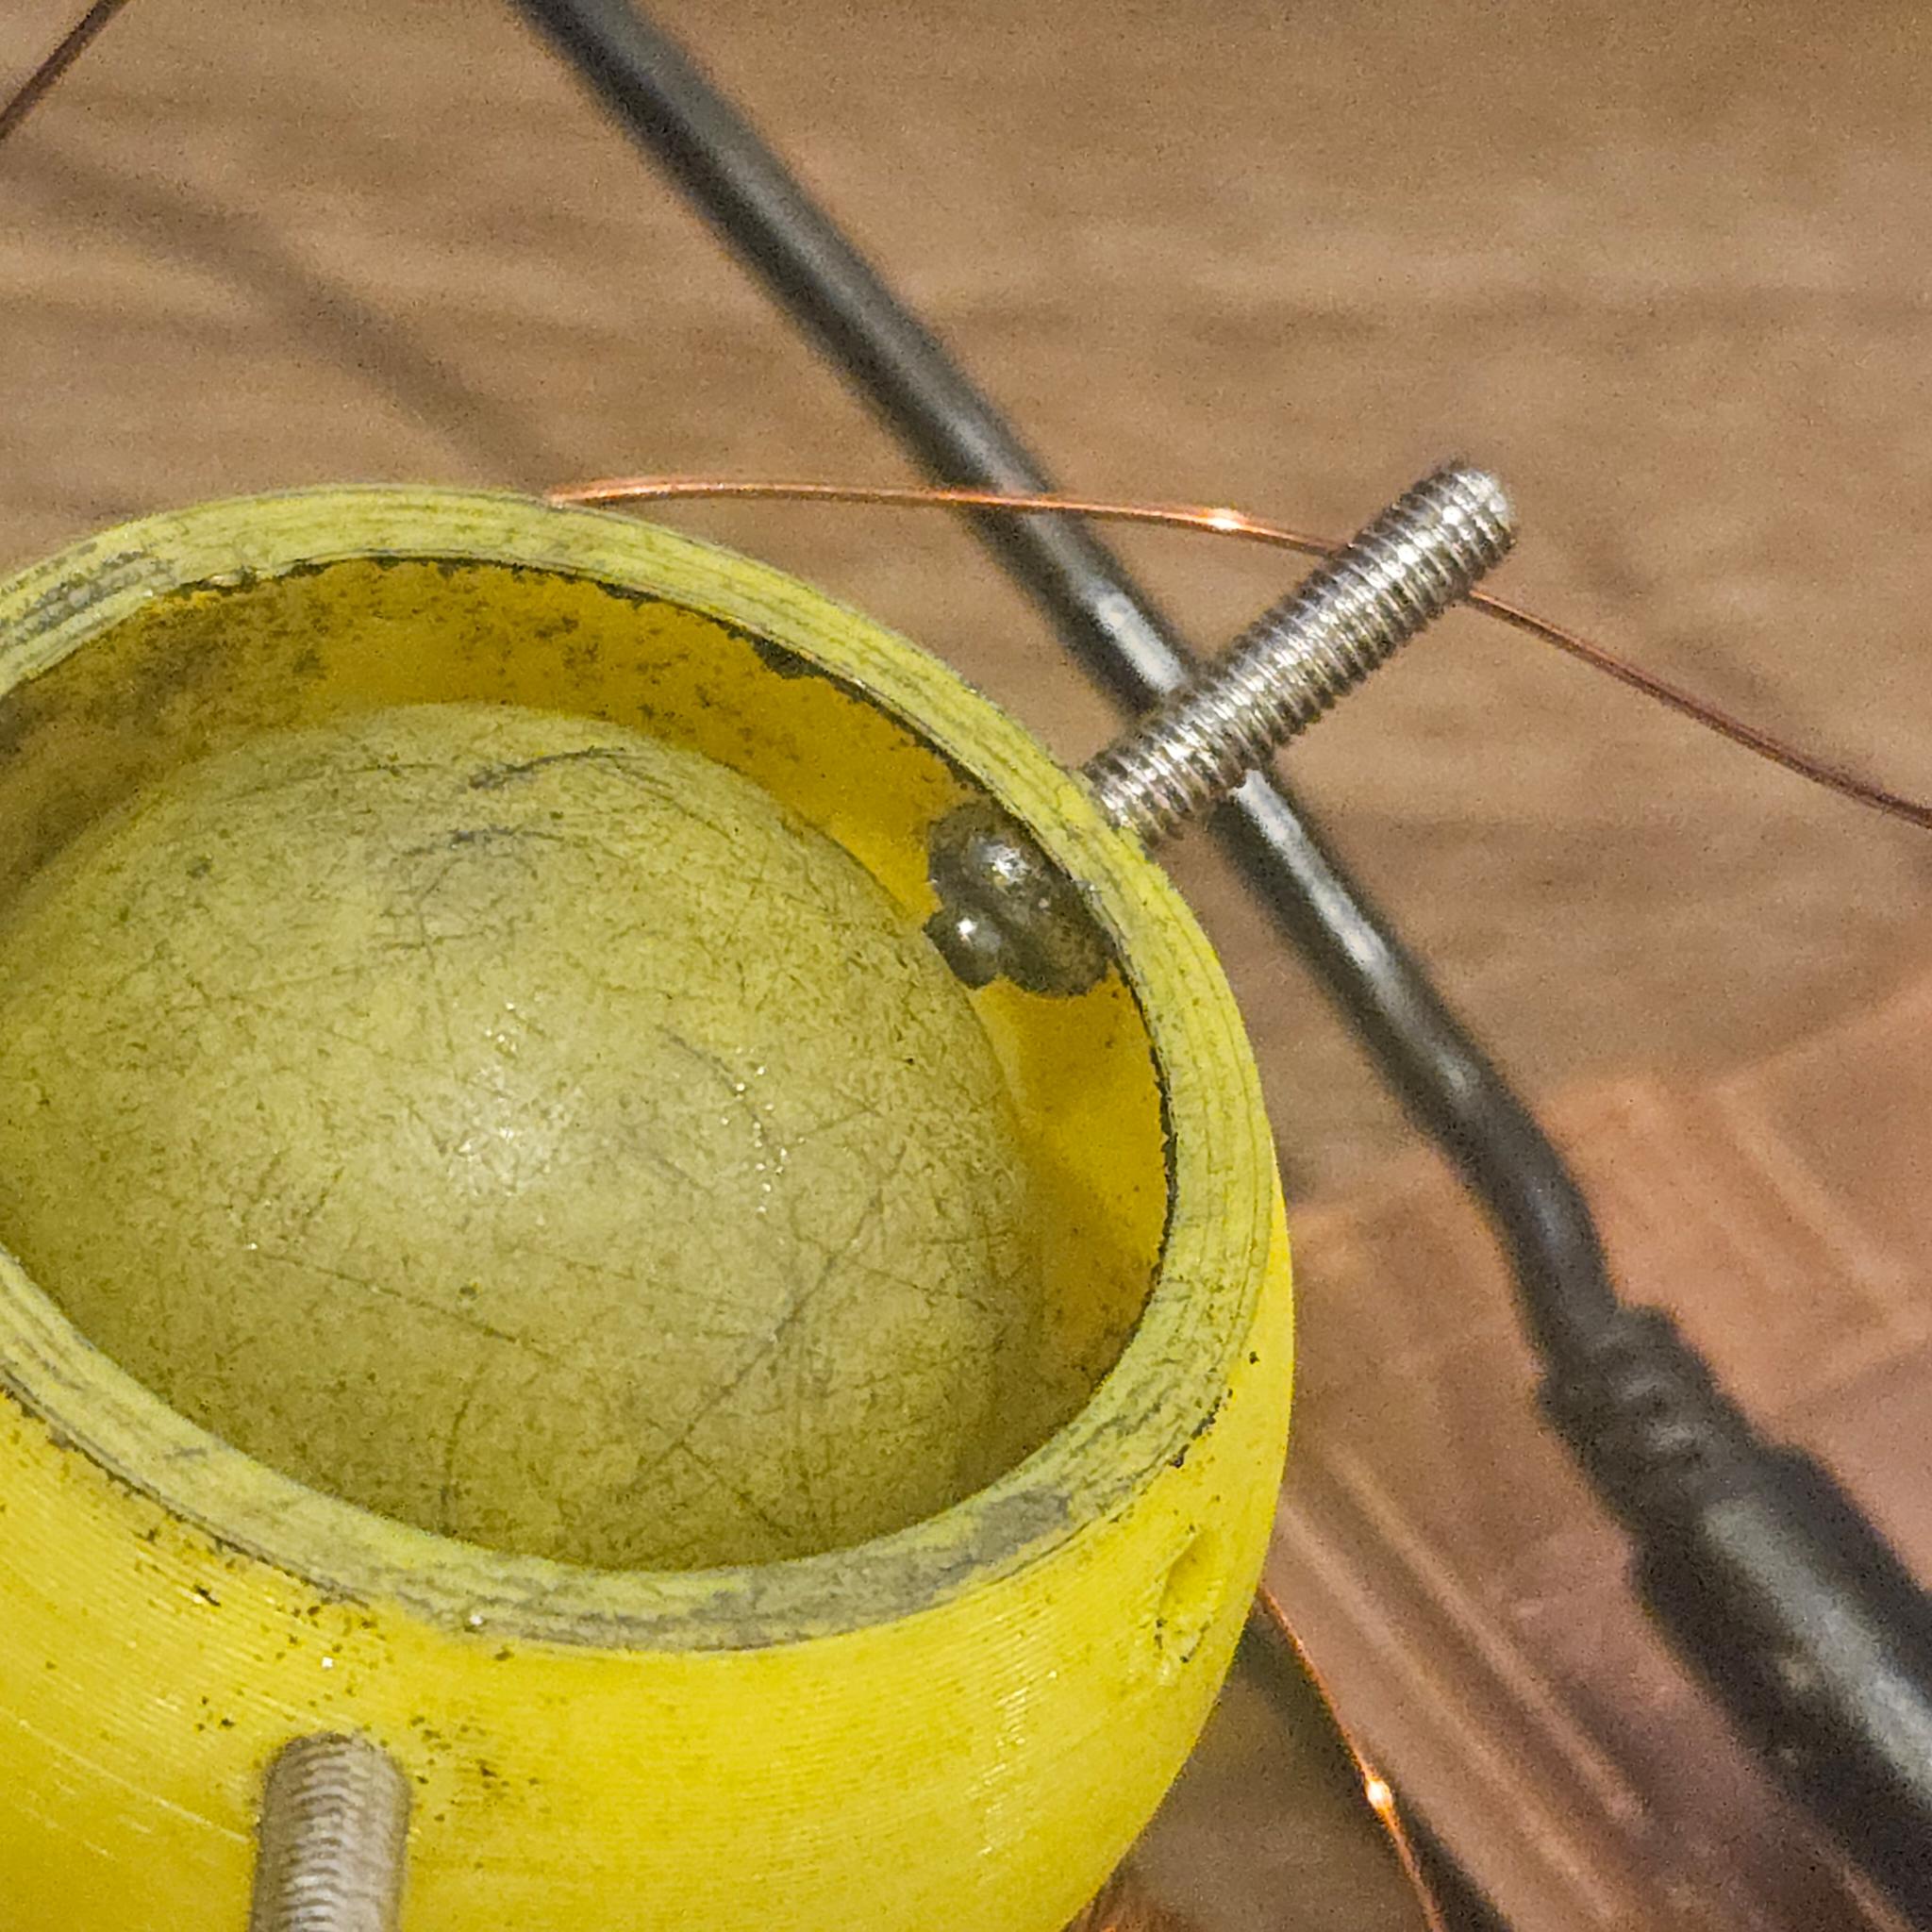
To make the sphere part rotate in more directions, I had to design a new stator. A few more hours of CADing led me to this weird table:

The idea here is the sphere goes inside this part, and is held in place by little bearings made out of M3 screws and bearing balls placed on the screw head. A generous amount of graphite is also used as lubricant.
Designing a Motor Driver
At this stage, my motor controllers were all exploding, I am sure due to my improper usage and over current. I decided to design a better motor controller, as one that does not have any experience with designing electric circuits does.
The idea seemed simple enough: a MOSFET controls a large amount of current between its source and drain, and its gate acts as a little capacitor whose charge dictates the current.2 Simple, right? Well, the internet tells me there’s something called flyback current that you need to account for as well.3 Still, I was able to come up with a design for a so-called half-bridge that in my head should work.

Cloning that circuit six times so I could control six coils, and creating a PCB for it with KiCad ended up with something looking like this:

How was I to make these PCBs though? In the past I have used services like JLPCB, but the thing that I dislike the most while building anything is having to wait on something else to happen so I can continue my building. I always chose the quickest way of getting me moving, not necessarily the best way of solving the problem. Maybe you can see where this is going…
Given I already had a CNC machine I used for my tiny calculator project4, I figured I could use this tip from hackaday and make my PCBs in the CNC machine by scratching the copper away and then drilling all the holes for the through-hole components.
It went better than I could have expected, and I had a two layer PCB ready for soldering in no time!
Axes
After getting the controller ready, I got reliable results spinning the sphere along a single axis in a couple different configurations.
First, with just three coils:
The with two layers of coils, each layer with three sets of coils each connected in series:
And finally I settled on this design for a multi-axis capable coil distribution.
But I never got it to self-start, which makes it basically impossible to actually control the sphere along multiple axis.
Some Weird Experiments
I also experimented with a solid metal rotor, just to see what would happen:
MicroPython
Throughout all these experiments, I used MicroPython to quickly iterate on the control design without having to think too much about the low level details.
My control loop was just a timer ticking and switching which coil was active after a number of ticks, as a form of speed control. It is also simple two switch the control scheme to (N-1) active coils with a single inactive coil cycling around. This uses more current but I am not sure if it delivers more torque.
import machine
import time

# Prepare the output pins for each coil
pins = [machine.Pin(p, machine.Pin.OUT) for p in [0, 1, 2, 3]]
PINS = len(pins)

for pin in pins:
    pin.off()

current_pin = 0
tick_counter = 0
ticks_per_coil = 115

def tick(timer):
    global current_pin, pins, PINS
    global tick_counter, ticks_per_coil

    tick_counter += 1

    if tick_counter >= ticks_per_coil:
        tick_counter = 0
        pins[(current_pin - 1) % PINS].off()
        pins[current_pin % PINS].on()
        current_pin += 1

tim = machine.Timer(1)
tim.init(freq=20000, callback=tick, mode=machine.Timer.PERIODIC)
Conclusion
After all this, I believe to design a proper spherical motor I would need to actually think a bit more about the physics driving the motor so the appropriate torque vectors could be generated. The fact the motor was never self starting likely points out to states where there is no magnetic “leverage.”
Nevertheless, this gave me an excellent experimentation platform for working with motor designs in the future, and gave me a lot of appreciation for what motor design actually is.
Appendix A: Building a CNC Machine
-
This is not exactly correct, as depending on the rules you might want to go for control, showing you can immobilise or move your opponent at will. ↩︎
-
Don’t quote me on that! ↩︎
-
I am pretty sure I am using the wrong kind of diode for protecting against that. ↩︎
-
Will talk about this one at some point! It’s one of the most interesting projects I have ever done! Also, see Appendix A. ↩︎